Generating and using XNB files
Usage
XNB files are the content files stored by the monogame API (& by extension the Microsoft XNA fraework). Monogame requires you stors any files you may use in the project, in the form of an xnb file; note because all files used by the monogame framework have a .XNB file extension you cant have two files with the same given name (within the same directory).
Visual Studio
I don't have any experience with using xamarin or mono studio, hence I assume they have different ways to add files to your project; for visual studio, if you have Monogame installed, the Windows Monogame Content Pipeline is automatically installed for each project you create.
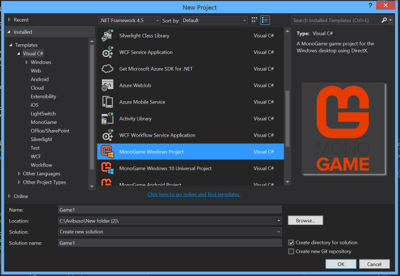
- Firstly you should create a new project:
- Goto File\New\Project and then select a new project.
- Goto File\New\Project and then select a new project.
- Then open the Content Pipeline
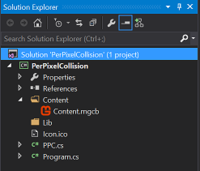
- Navigate to the solution Explorer.
- Expand the content folder.
- double click on the Content.MGCB file.
- You should be able to see your project content
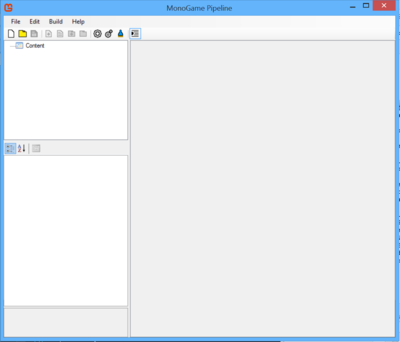
- From the pipeline you can modify existing files, add existing files or create new files to your project.


- To add an existing file (for example test.png [an image file])
- Select your Content directory, navigate to "edit\add\existing item"
- In the popup menu navigate to the file you wish to add, then select and add it.
- In the add file dialog box you have 3 options on how to store the file (this is pretty self explainatory, hence I wont go into detail on it), if you are unaware of what to do then just select "Copy the file to the directory".
- To delete an existing file in your Content
- Select the file in question
- Right click on the selected file
- Click delete (Note if you delete a file you'll later use in your project, an Exception will be thrown if a file with the same name is not in the content pipline).
- To create a new file, such as a spritefont (which can be used to print text in your game)
- Select your Content directory, navigate to "edit\add\new item"
- Select the content type: Effect, Sprite Effect, SpriteFont Discription, XML Content
- Enter a name for your new file & click OK to add it to your content pipeline.
- Note if you want you can modify newly created files by double clicking on them from the pipeline.
- Just as a final note, if you grow tired of having every project file in the main directory, you can create folders and place files within them.
- To create folder goto "Edit\Add\New Folder"
S.N. For those you having difficulty loading files added to the pipeline into your game, remember that file types are removed after the files are added to the pipeline. Hence if you added a file name "X.png" into the folder "Blarg\Path\To\Folder" you can load it into your game by writing Content.Load<Texture2D>("Blarg\Path\To\Folder\X"); note no file type.