Difference between revisions of "Creating a virtual environment in Visual Studio"
(→New Virtual Environment) |
(→New Virtual Environment) |
||
| Line 18: | Line 18: | ||
[[File:Myenv created.png]] | [[File:Myenv created.png]] | ||
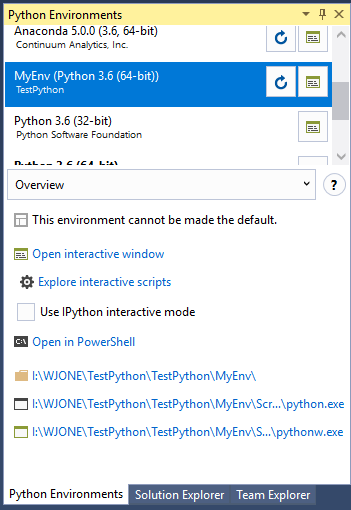
| − | Now you can change from solution explorer to python environments: | + | Now you can change from solution explorer to python environments, and select your virtual environment: |
[[File:PythonEnvironmentswithmyenv.png]] | [[File:PythonEnvironmentswithmyenv.png]] | ||
Revision as of 14:19, 30 April 2019
If you have created a new Python based project, you now need to create a virtual environment. You lack the permissions on college machines to install any python modules, on your own machines virtual environments are a good idea for controlling which python modules are installed for which python projects.
New Virtual Environment
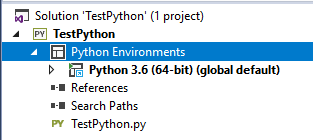
In the solution explorer for your new project:
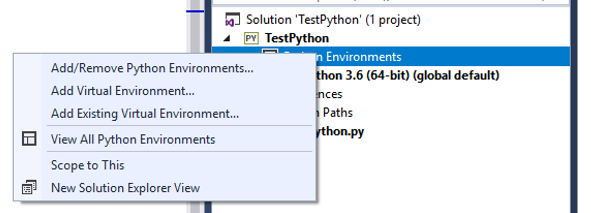
You will be able to right click on Python Environments and select 'Add Virtual Environment':
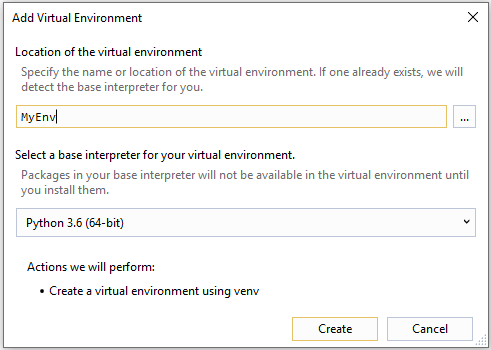
You will need to give the environment a name, this is called 'MyEnv':
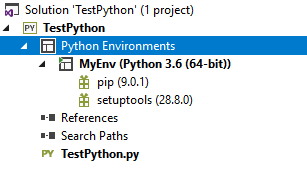
You should also select the version of python, select the highest available. Once completed, your environment should be created here:
Now you can change from solution explorer to python environments, and select your virtual environment:
Using Virtual Environment
In college, you can't use the Visual Studio option to install a package into your virtual environment. This seems to be a permission issue, and you also can't run a command prompt to actually enter the code yourself.
